Desktop Pictures Cropper
Turn your best pictures into stunning desktop pictures. Automatically cropped to the right size. No distortions. No borders. No random selections. Readily available as a Bash script on GitHub.
Everyday Teleporters
As I may have slightly hinted at in an earlier article, pictures play an import part in my life. Pictures hold the power to transport me back to the place they were taken.
Pictures are my everyday teleporter. My time machine. My short escape.
Pictures can bring back at lot of the memories and emotions surrounding them on the day they were taken. Oddly enough, for most pictures, I actually know exactly where they were taken. Even years after I’ve taken them. Even for the one below.
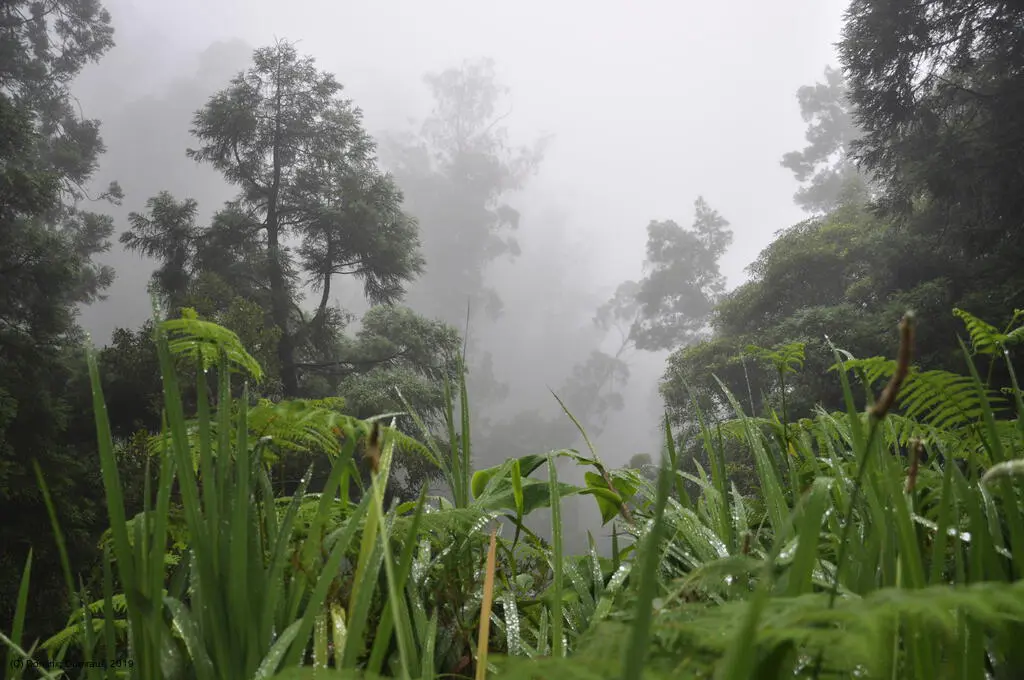
Just to be sure, I also geolocate them. But that’s another story.
Photo Albums?
Having all those mini-teleporters is all good and great. But what to do with all of those great pictures in terms of everyday use?
Sure, I could print all pictures and put them in nice photo albums. Just to collect dust over the next decades before eventually being binned. That’s a lot of money for the bin.
A potentially cheaper and more scalable solution is a digital photo album but again, indulging in the snaps takes time and effort as well as a conscious decision to actually have a look at them in the first place. Most of the time I just bluntly forget about them. Not ideal.
Wall Prints?
A more “in-your-face” approach would be preferred. Well, if I’m already considering printing pictures, I may as well print them out in a large enough size to hang up on a wall. And I’ve done that in the past.
Amazing pictures look even better when printed out on canvas the size of a billboard ad.
That’s a great idea but unfortunately, my wall space is limited and I don’t have that many billboards to fan out to. Moreover, elastic wall space is unfortunately still nowhere near being available to me anytime soon, so I am either left with a limited selection of pictures to put up on the walls or accept stacking them.
Both options don’t really appeal to me that much as there’s real money associated with large prints that might eventually start collecting dust when the novelty wears off once they’re up on the wall. Plus, the hardest choice of them all is to choose the ones that will eventually end up on the wall.
An Infinitely Scalable Wall!
But there may be a glimpse of hope. With the increased size of desktop monitors and the personalisation options built into modern operating systems, there may be an infinitely scalable wall already at our disposal - the Desktop Background. And best of all: Displaying images on desktops is free. Plus it scales.
If it wouldn’t be for the resulting mild flickering, I could knock myself out and have my Mac change the desktop picture on every screen every 5 seconds.
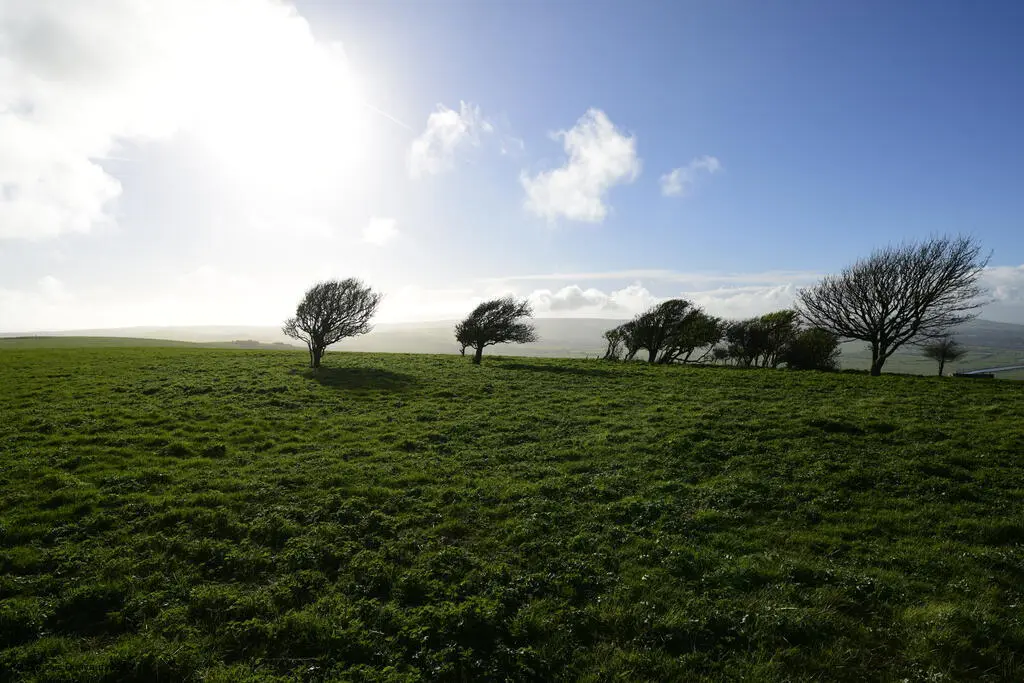
However, there’s a tiny problem. My pictures are either in 3:2 or 4:3 aspect ratio, depending on the camera they were taken with. All my monitors tend to be in the widescreen league. This means that I am either left with awkward borders on the sides or zoomed in areas which I can’t select on a per image base. Both isn’t really ideal, as I’d like to be able to control the areas that get cropped as well as the one that actually gets displayed.
For example, in the sunset image below, the focus is on the centre section of the image. Hence, I’d like to be able to crop an equal amount of the top and bottom sections and be left with the centre part of the image.
Choosing a Resolution
Obviously, the size (and more to the point, the aspect ratio) of the final desktop pictures dictate the areas that get cropped from standard input pictures. But which size to choose for desktop pictures?
Fortunately, macOS comes with a decent selection of desktop pictures in /Library/Desktop Pictures that can be used as a starting point.
A closer look at the macOS stock desktop pictures reveals that they are in
5120px x 2880pxresolution.
So, all that’s left to do is crop all those great pictures down to 5120px x 2880px. Should be easy, right?!
Automating the Cropping
Now, cropping a single image is fairly straightforward. Any half way decent imaging tool will most likely do the trick.
The problem becomes a bit more challenging when trying to automate the process, so that there’s a predefined image area and any excess on either the left, right, top or bottom gets cropped.
The good news is that there are already great tools out there that do all the heavy lifting. All that’s left to do is select the areas to be cropped and feed it into these tools. This makes for excellent reuse and an architecture based on carefully Sellotaping existing components together. So, when cropping the example image above, the outcome should be as below.
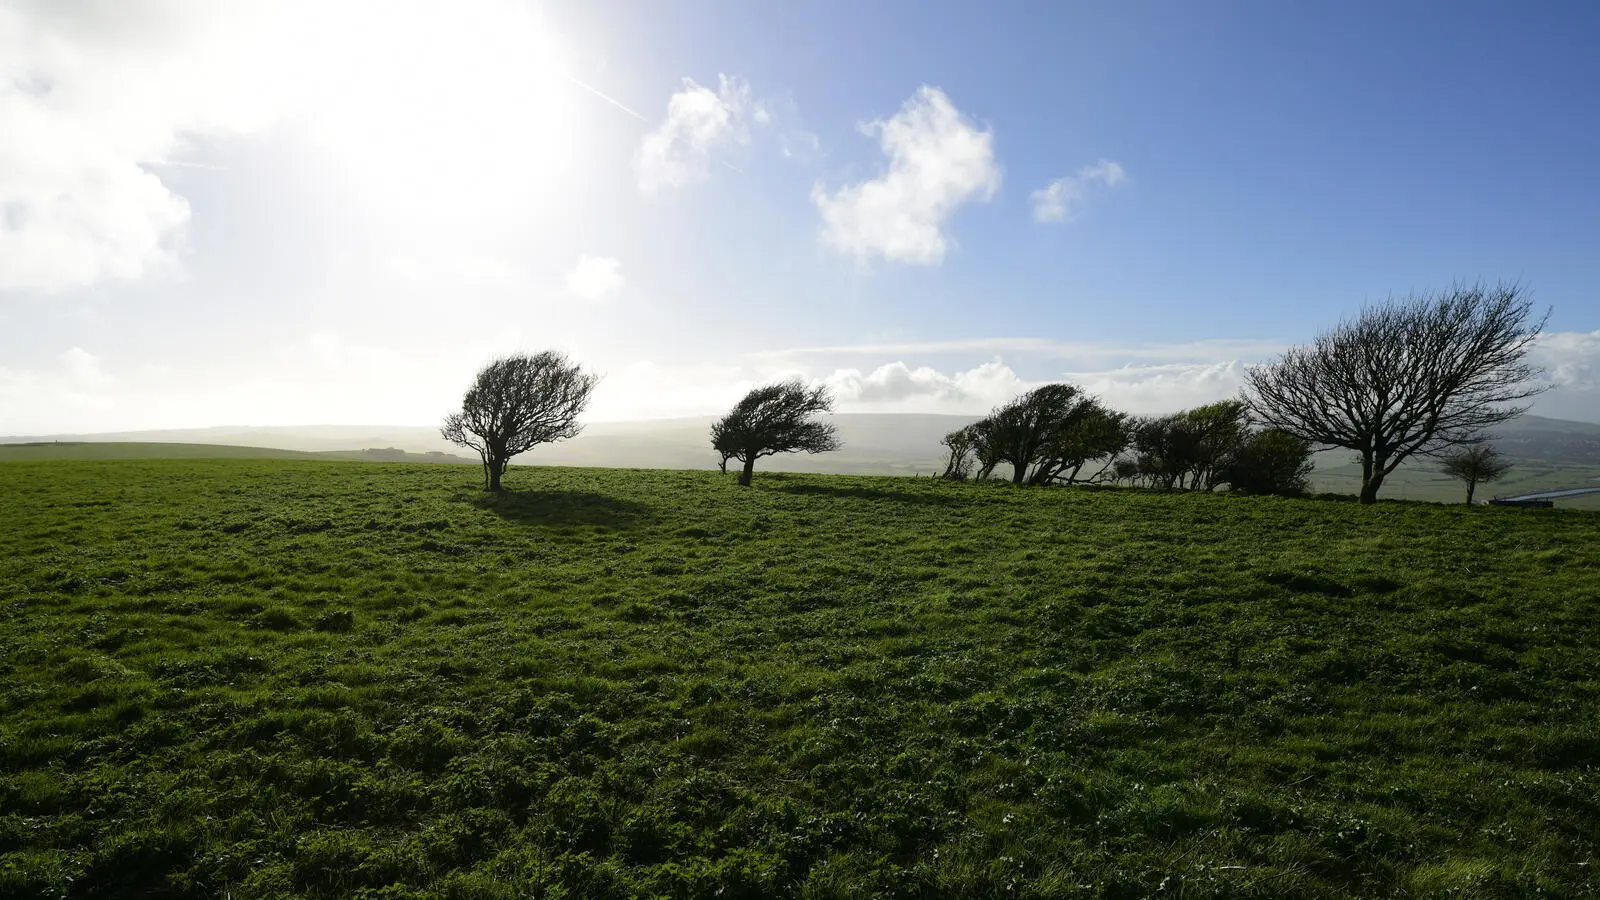
It may be hard to see at first, but an equal amount of the top and bottom sections were cropped and what’s left is the centre part of the image. I actually use that image as one of my many desktop pictures.
Oh, and while we’re at it, extend the above process to portrait mode as well, as I’ve got a monitor in portrait mode. Great for coding or background reading but that’s again another story.
All of the above can be achieved with the “Desktop Pictures Cropper” described below.
Desktop Pictures Cropper
The GitHub repository https://github.com/dumrauf/desktop_pictures_cropper contains a Bash script to automate the process of cropping a set of images so that they can be used as native desktop pictures.
The resulting images have the same high resolution as the stock macOS desktop pictures. Both landscape and portrait images are supported.
You Have
Before you can use the tool in the repository out of the box, you need the following tools preinstalled
- a recent version of
exiftool(the script has successfully been tested with version 10.59) - a recent version of ImageMagick that ships with the
convertprogramme (the script has successfully been tested with ImageMagick 6.9.9-26 Q16 x86_64 2018-03-07)
Moreover, you need
- a collection of landscape or portrait images
- to decide how to crop each image (see below for details)
You Want
After cropping the images, you get
-
5120px x 2880pxhigh resolution landscape desktop pictures -
2880px x 5120pxhigh resolution portrait desktop pictures
Here, the images are output to corresponding sub-directories named Landscape and Portrait and can be used as macOS desktop pictures as is. Note that the final image size can be configured if needed. See the FAQs below for details.
Pre-Sorting the Images
The cropping script requires your help in order to decide which section of each image to crop.
The section to crop is determined by the folder the image is located in. Here, folder names are chosen to represent the area that is unaffected by the cropping.
Landscape Images
There are three options available for landscape images:
- North
- Center
- South
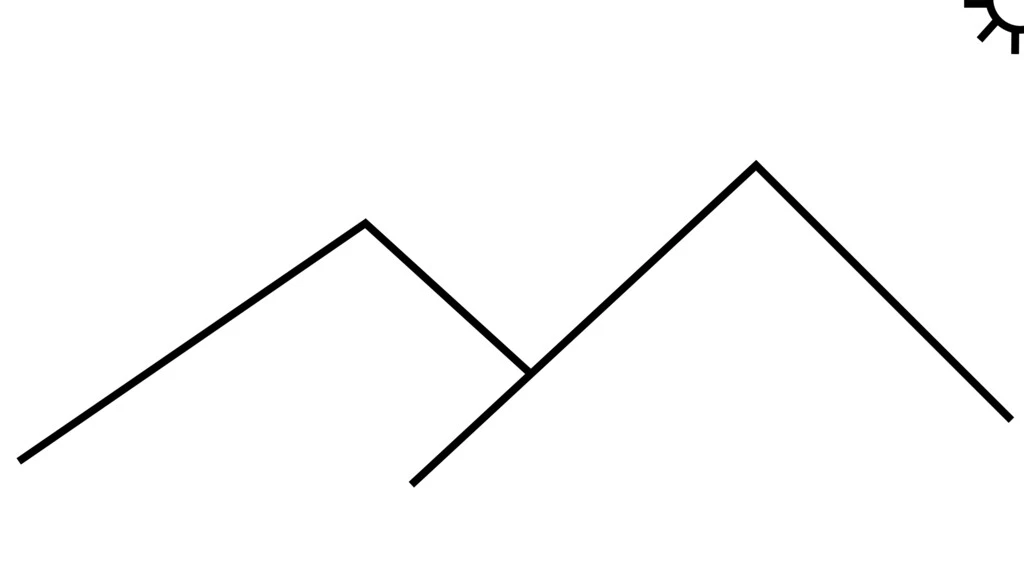
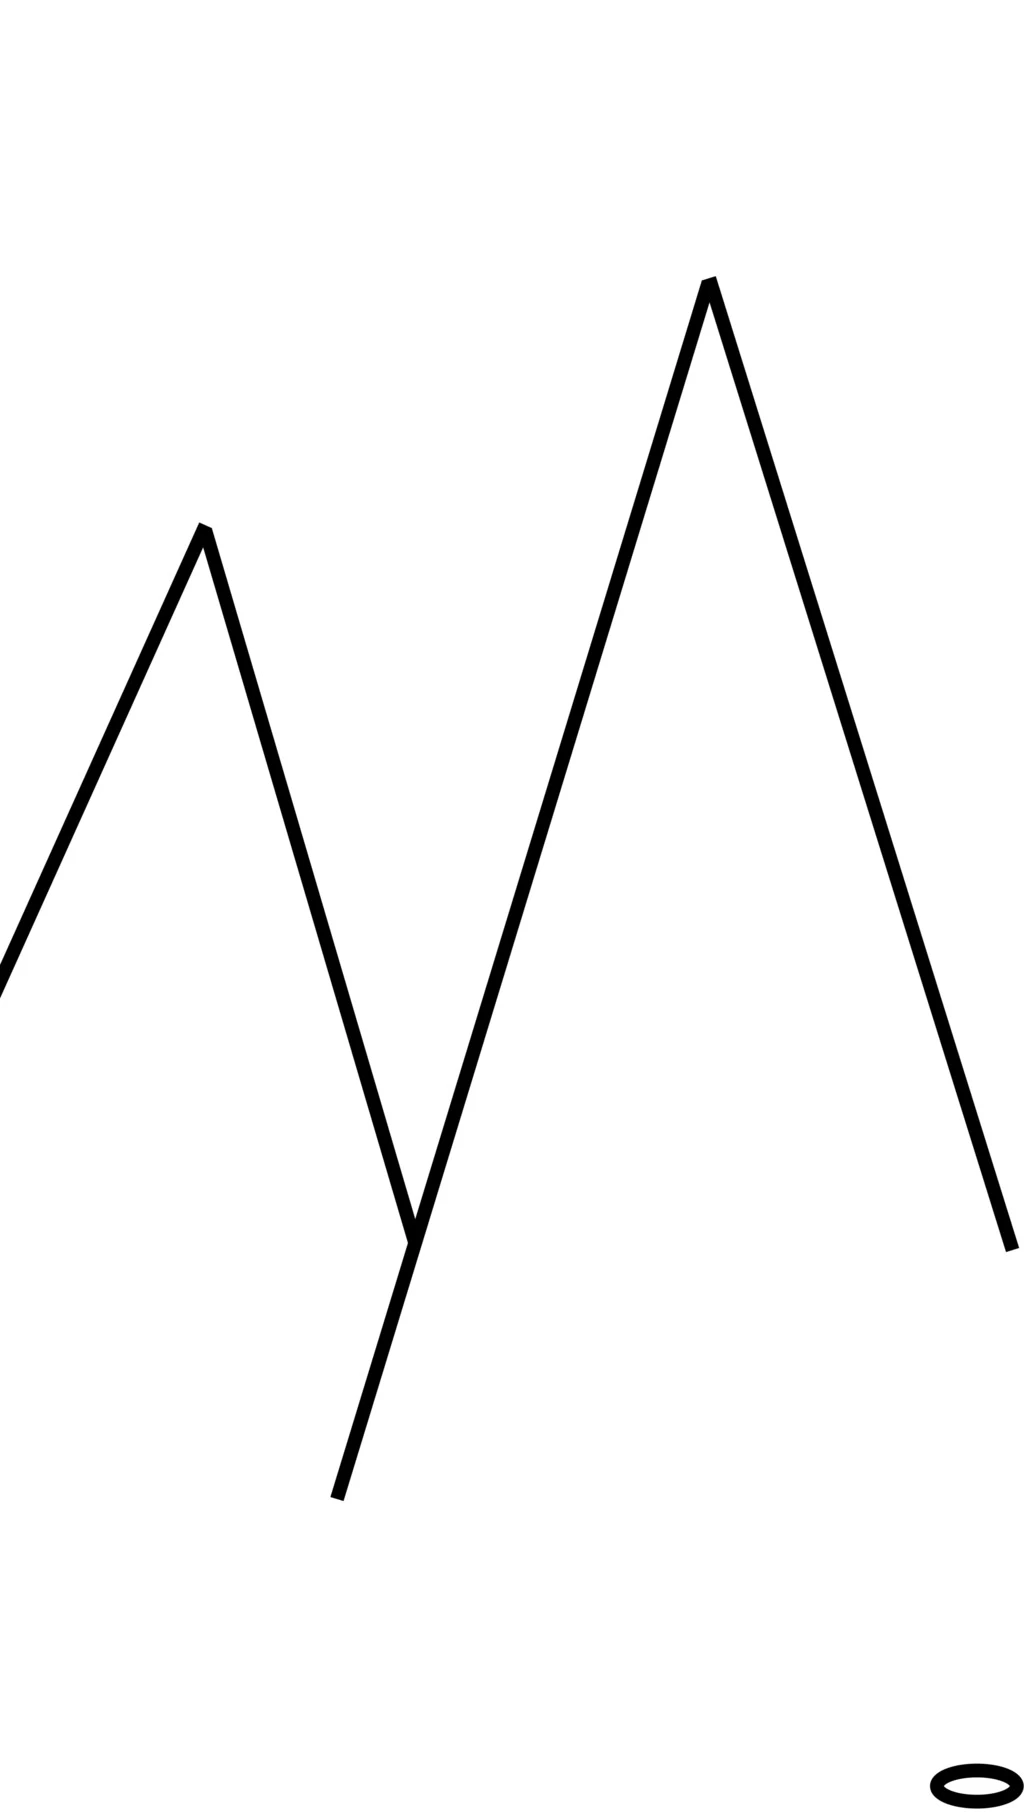
Consider the following example of a lovingly handcrafted example landscape image (side note: it turns out macOS Preview is really all you need to draw such rough sketches)
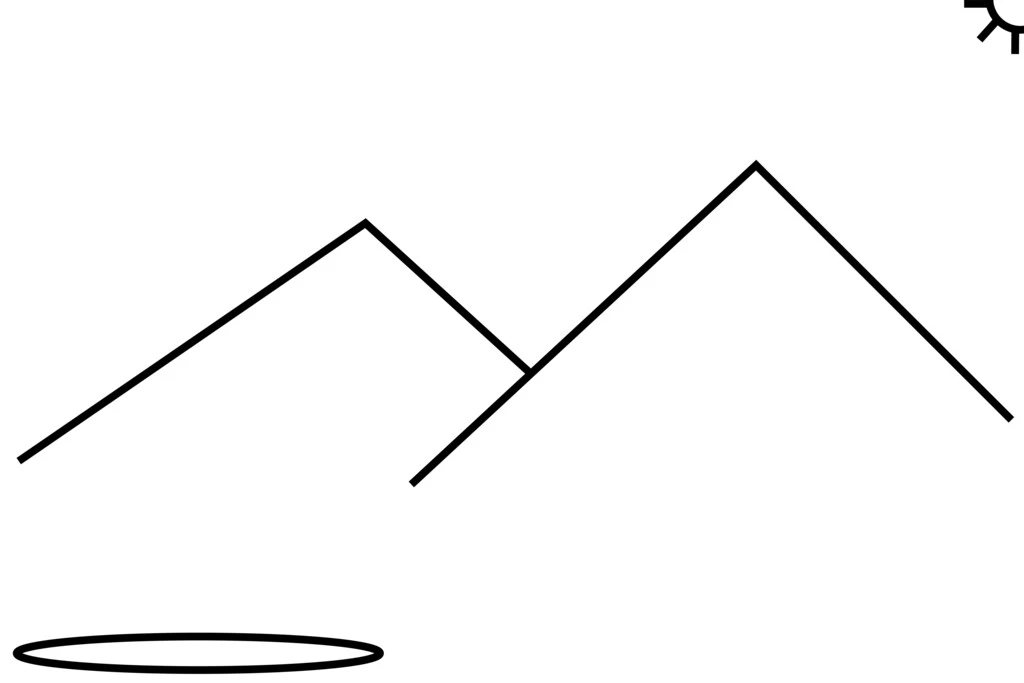
The items in the image roughly represent
- the sun in the upper right hand corner,
- two mountains in the middle, and
- a pond in the bottom left hand corner.
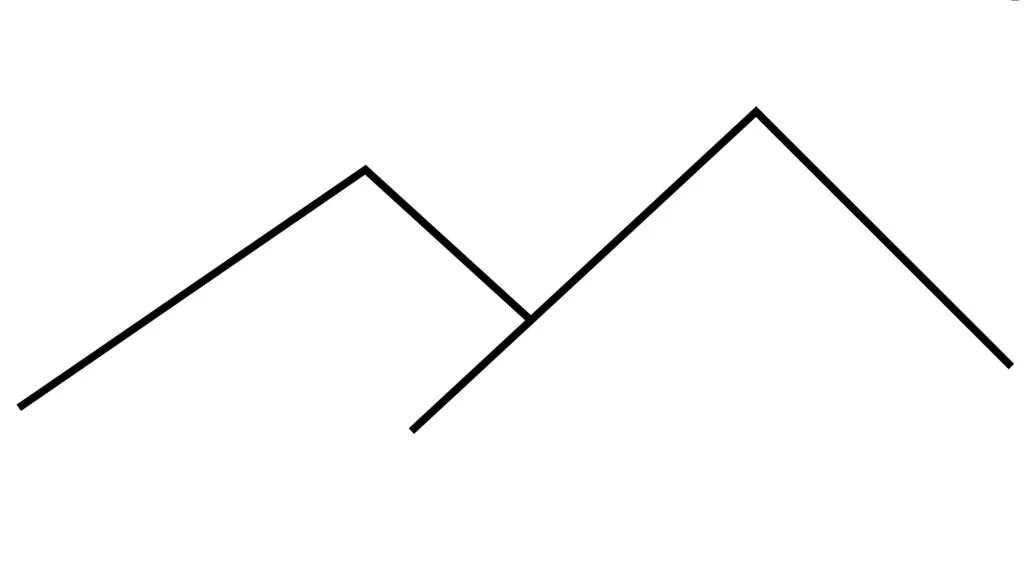
North
This option preserves the top section of the image and clips a bottom section of the image. For the example landscape image, the resulting cropped image is
Here, note how the pond at the bottom left hand corner has been cropped.
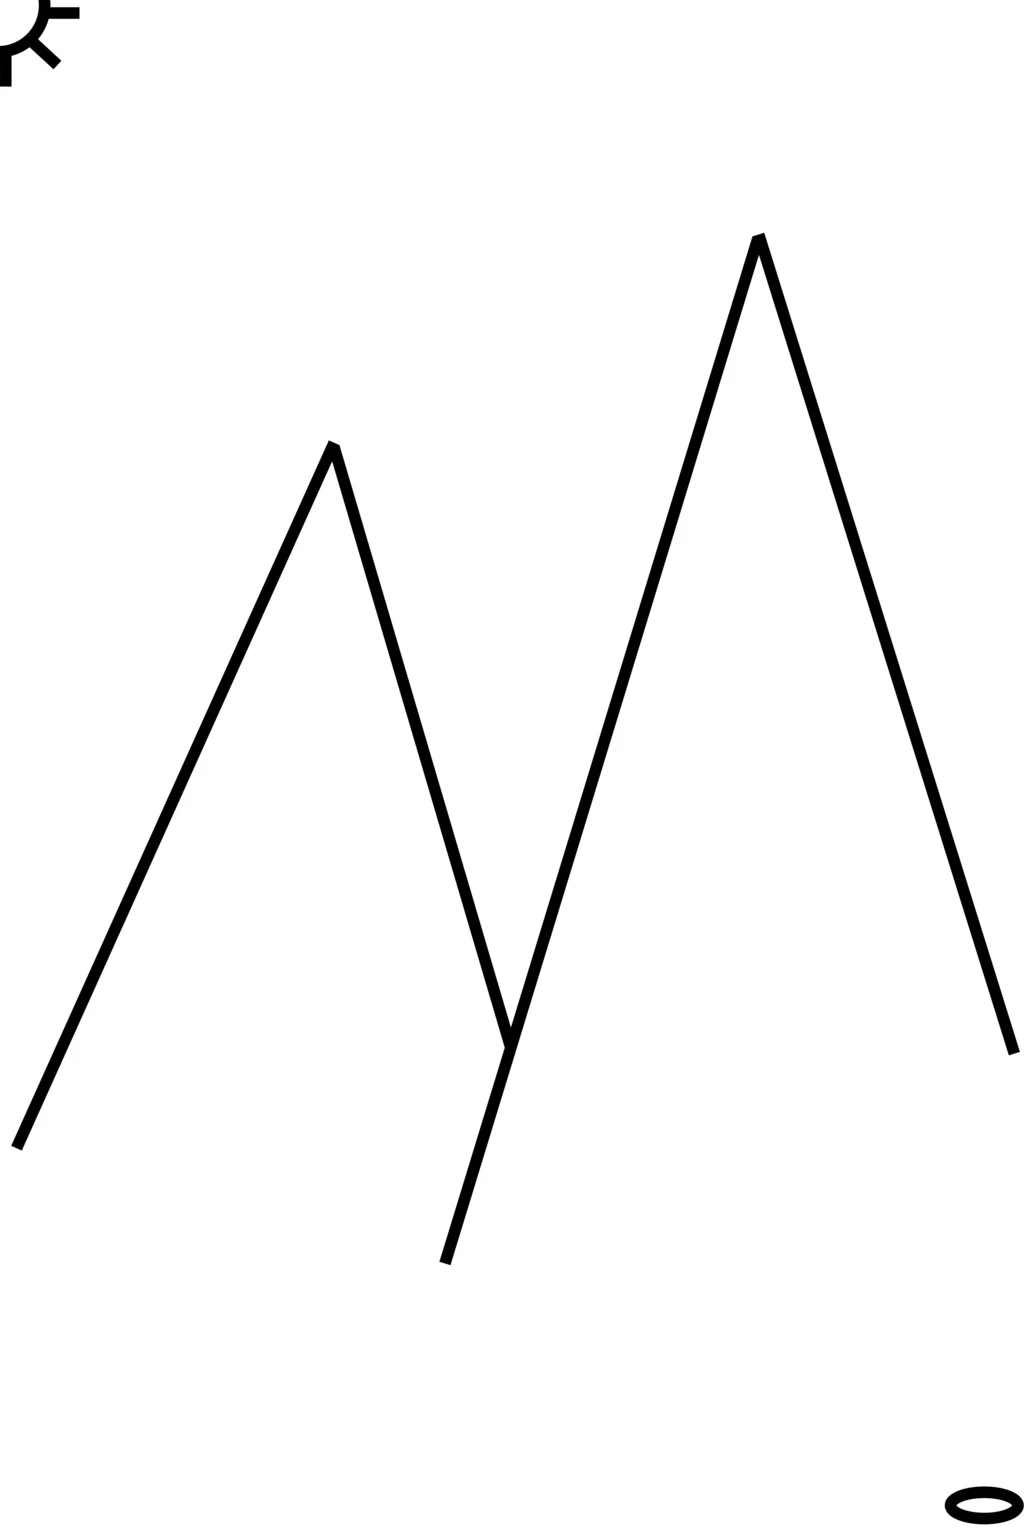
Center
This option preserves the centre section of the image and clips an equal section of the top and bottom of the image. For the example landscape image, the resulting cropped image is
Here, note how the sun in the upper right hand corner as well as the pond at the bottom left hand corner have been cropped.
South
This option preserves the bottom section of the image and clips a top section of the image. For the example landscape image, the resulting cropped image is
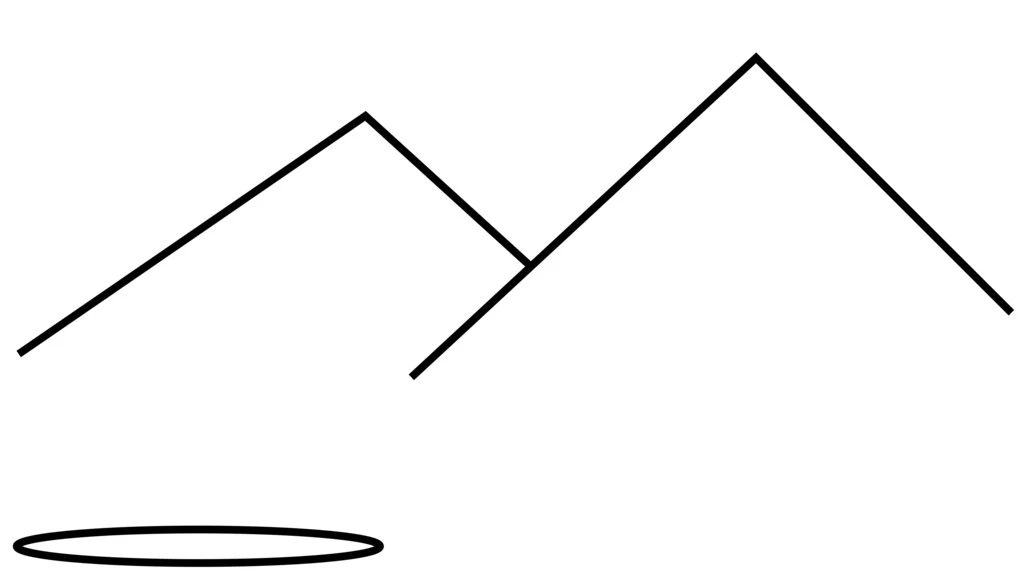
Here, note how the sun in the upper right hand corner has been cropped.
Portrait Images
There are three options available for portrait images:
- East
- Center
- West
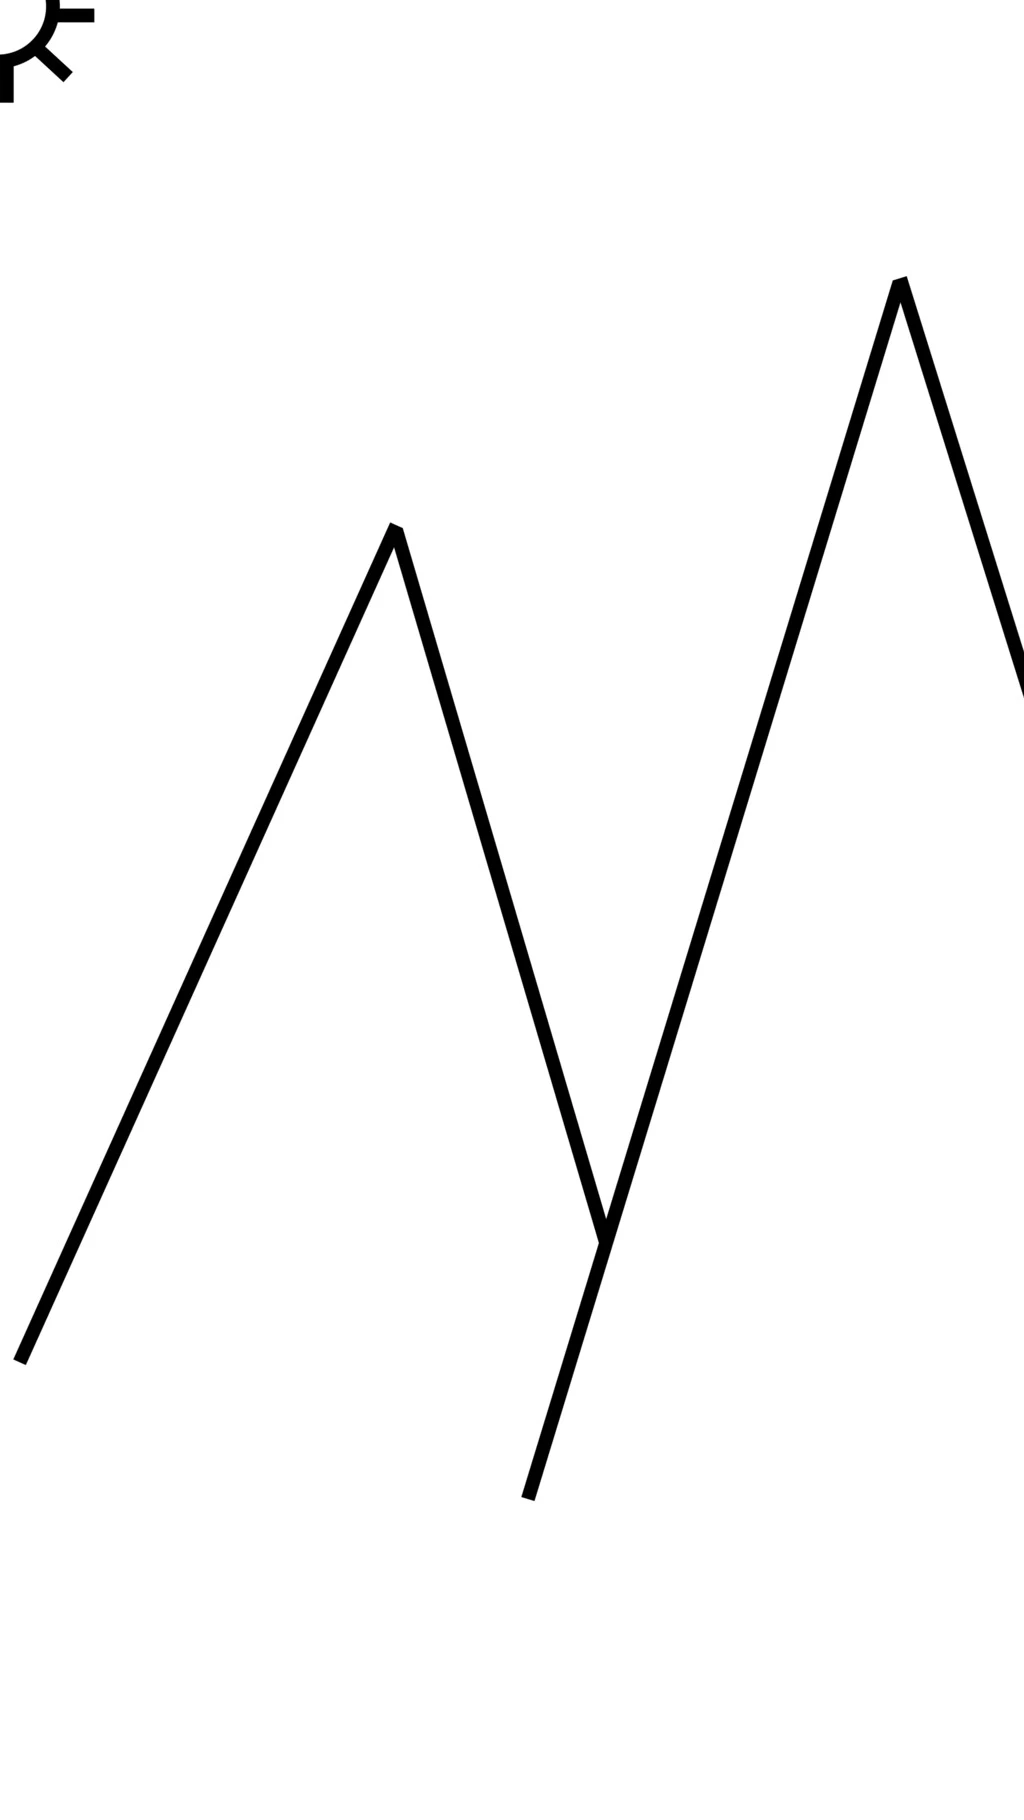
Consider the following example of a lovingly handcrafted example portrait image
The items in the image again roughly represent
- the sun in the upper left hand corner,
- two mountains in the middle, and
- a pond in the bottom right hand corner.
East
This option preserves the right hand section of the image and clips a section on the left hand side of the image. For the example portrait image, the resulting cropped image is
Here, note how the sun in the upper left hand corner has been cropped.
Center
This option preserves the centre section of the image and clips an equal section of the left and right hand side of the image. For the example portrait image, the resulting cropped image is

Here, note how the sun in the upper left hand corner as well as the pond at the bottom right hand corner have been cropped.
In order to avoid duplication, the same
Centerfolder is used for both landscape and portrait images.
West
This option preserves the left hand section of the image and clips a section on the right hand side of the image. For the example portrait image, the resulting cropped image is
Here, note how the pond in the bottom right hand corner has been cropped.
Execution
The stand-alone Bash script cropper.sh is located in the root folder. It requires an <input-directory> of pre-sorted desktop images (see above for details) as well as an <output-directory> where to write the cropped images to. In case the <output-directory> does not exist, it is created.
Note that all landscape images are eventually located in <output-directory>/Landscape/. All portrait images are eventually located in <output-directory>/Portrait/.
All pre-sorted images in Symbolic/Originals/ can be cropped and output to Symbolic/Cropped/ via
cropper.sh "Symbolic/Originals/" "Symbolic/Cropped/"
Output File Naming and Caching
Each image <name>.<suffix> located in the input directory is eventually converted to <name>.jpg in the output directory. Here, <suffix> is a file extension convert can handle.
As converting and cropping images can be a time consuming task, the Bash script treats each file <name>.jpg in the output directory as the converted and cropped image of <name>.<suffix>. Hence, <name>.<suffix> is assumed to have already been converted and is subsequently ignored.
FAQs
Below is a list of frequently asked questions.
What’s the Resolution of the Resulting Landscape Desktop Pictures?
The cropped landscape desktop pictures are 5120px x 2880px. Note that this is also the resolution of the stock macOS desktop pictures in /Library/Desktop Pictures.
What’s the Resolution of the Resulting Portrait Desktop Pictures?
The cropped portrait desktop pictures are 2880px x 5120px.
How Can I Change the Resolution of Landscape Images?
The cropping values for landscape images are defined in variables
LANDSCAPE_WIDTHLANDSCAPE_HEIGHT
at the beginning of cropper.sh. Adjust them as needed.
How Can I Change the Resolution for Portrait Images?
The cropping values for portrait images are defined in variables
PORTRAIT_WIDTHPORTRAIT_HEIGHT
at the beginning of cropper.sh. Adjust them as needed.
Conclusion
The cropper.sh Bash script introduced above makes it easy for me to crop great pictures into stunning desktop pictures. Fully automated. Cached. And at scale.
While this works for me, it may be different in your case. Feel free to leave a comment or contribute to the Git repository, so we can make things better for everyone. Thanks!
Subscribe to How Hard Can It Be?!
Get the latest posts by following us on LinkedIn and Twitter
